Some time ago I posted an article about an acceptance testing framework called Yatspec(Yet Another Test Specification) which is becoming very popular among the Java community: http://javing.blogspot.co.uk/2015/03/yet-another-blog-article-about.html
It is definitely worth researching deeper into this framework because it offer lots of interesting options to make beautiful live specifications.
The example I will present its very trivial and does not cover how to write an acceptance test, it just covers how to add images to an already existing Yatspec test.
Imagine that you had a method that whenever you called it at any point in the test, it takes an screen shoot for you and adds it to the report.
In order to demostrate, how it works, I created a class called GuiSeleniumAndYatspecTest that contains all the necessary Yatspec code and also a way of taking screen shoots.
1 2 3 4 5 6 7 8 9 10 11 12 13 14 15 16 17 18 19 20 21 22 23 24 25 26 27 28 29 30 31 32 33 | @RunWith(SpecRunner.class) public class GuiSeleniumAndYatspecTest extends TestState implements WithCustomResultListeners { private static final String START_URL = "http://www.google.com"; protected WebDriver driver; protected static WebDriverBackedSelenium selenium; @Before public void setupSelenium() throws InterruptedException { driver = new FirefoxDriver(); selenium = new WebDriverBackedSelenium(driver, START_URL); selenium.open(START_URL); selenium.waitForPageToLoad("2000"); } @After public void closeSelenium() throws Exception { selenium.stop(); } public void takeScreenshoot() throws Exception { String imageData = selenium.captureScreenshotToString(); this.capturedInputAndOutputs.add(ScreenshootHolder.INTERESTING_GIVENS_KEY, new ScreenshootHolder(imageData)); System.out.println("Captured screen shoot"); } @Override public Iterable<SpecResultListener> getResultListeners() throws Exception { String testName = this.getClass().getSimpleName(); return Arrays.asList((SpecResultListener) new HtmlWithScreenshootResultListener(testName)); } } |
There are some interesting things to notice in this class which will enable the usage of images in the yatspec acceptance test. Let's have a look at each:
- The takeScreenshoot() method, does 2 things, the first its to transform an image taken via selenium into an String, and then passing that String to a class called ScreenshootHolder, that will transform it into a byte[] to be understood by Yatspec.
1 2 3 4 5 6 7 8 9 10 11 12 13 | public class ScreenshootHolder { public static final String INTERESTING_GIVENS_KEY = "Screenshot"; private final String base64PngDataString; public ScreenshootHolder(String base64PngImageData) { this.base64PngDataString = base64PngImageData; } public byte[] getPngImageData() { return org.apache.commons.codec.binary.Base64.decodeBase64(base64PngDataString); } } |
- Notice that the test case is implementing an interface called withCustomResultListener.
By using this interface, Yatspec will force us to override the method getResultListeners(), which is a mechanism to pass to Yatspec all the custom implementations for things we want our test to do, such as recoding images. The important thing in that method, is the usage of the class HtmlWithScreenshootResult, which is the implementation we need to create, to support the screenhoots.1 2 3 4 5 6 7 8 9 10 11 12 13 14 15 16 17
public class HtmlWithScreenshootResultListener implements SpecResultListener { private final ScreenshootRenderer screenShotRenderer; private HtmlResultRenderer delegate; public HtmlWithScreenshootResultListener(String testName) { delegate = new HtmlResultRenderer(); screenShotRenderer = new ScreenshootRenderer(testName); delegate.withCustomRenderer(ScreenshootHolder.class, screenShotRenderer); } @Override public void complete(File yatspecOutputDir, Result result) throws Exception { screenShotRenderer.setYatspecOutputDir(yatspecOutputDir); delegate.complete(yatspecOutputDir, result); } }
- Finally the Listener from before uses is an SpecResultListener, by implementing this interface, we can reach the output directories and the test result, via the complete(). The class ScreenshootRenderer, needs to be created to be able to set the output directory of the test and write the images to the temporary folder in the file system.
1 2 3 4 5 6 7 8 9 10 11 12 13 14 15 16 17 18 19 20 21 22 23 24 25 26 27 28 29 30 31 32
public class ScreenshootRenderer implements Renderer<ScreenshootHolder> {

    private File yatspecOutputDir;
    private String testName;

    public ScreenshootRenderer(String testName) {
        this.testName = testName;
    }

    @Override
    public String render(ScreenshootHolder screenshootHolder) throws Exception {
        if (yatspecOutputDir == null) {
            throw new IllegalStateException("You must use screenshootssupport.HtmlWithScreenShootResultListener in your test to use ScreenShotRenderer");
        } else {
            String imageFilename = yatspecOutputDir + File.separator + getImageName();
            try (FileOutputStream fos = new FileOutputStream(imageFilename)) {
                fos.write(screenshootHolder.getPngImageData());
            }
            System.out.println("Rendered screenshot to " + imageFilename);
            return String.format("<div class='nohighlight'><img src=\"%s\" alt=\"%s\"></img></div>", imageFilename, imageFilename);
        }
    }

    public void setYatspecOutputDir(File yatspecOutputDir) {
        this.yatspecOutputDir = yatspecOutputDir;
    }

    protected String getImageName() {
        String timestamp = Long.toString(System.currentTimeMillis());
        return String.format("test-%s-%s.png", testName, timestamp);
    }
}
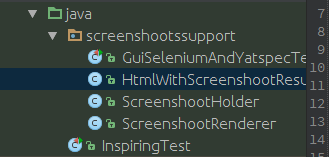
It is useful to organise this implementations in a separate package, since they are specific just to the capture of images.

The acceptance tests now will display screenshots as a captured input or output:

The acceptance tests now will display screenshots as a captured input or output:
You can download this code examples from: https://github.com/SFRJ/yatspecscreenshoots


No comments:
Post a Comment